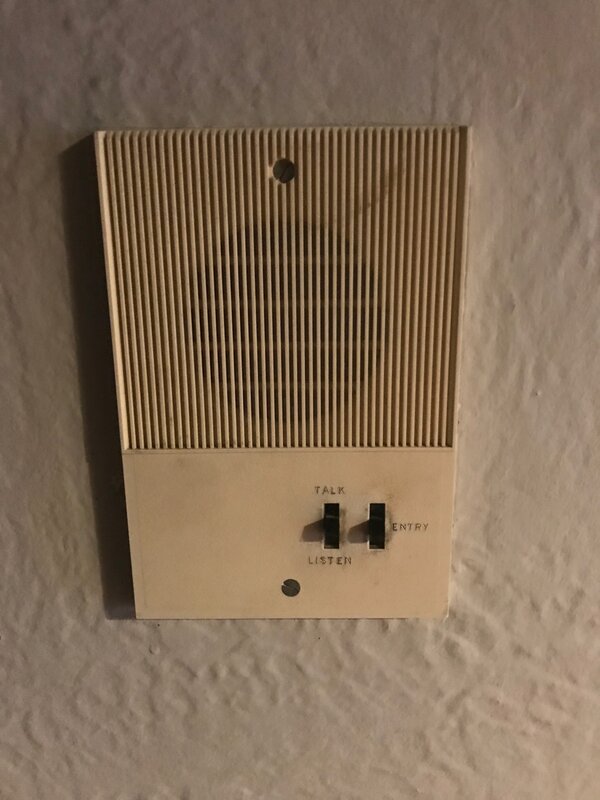
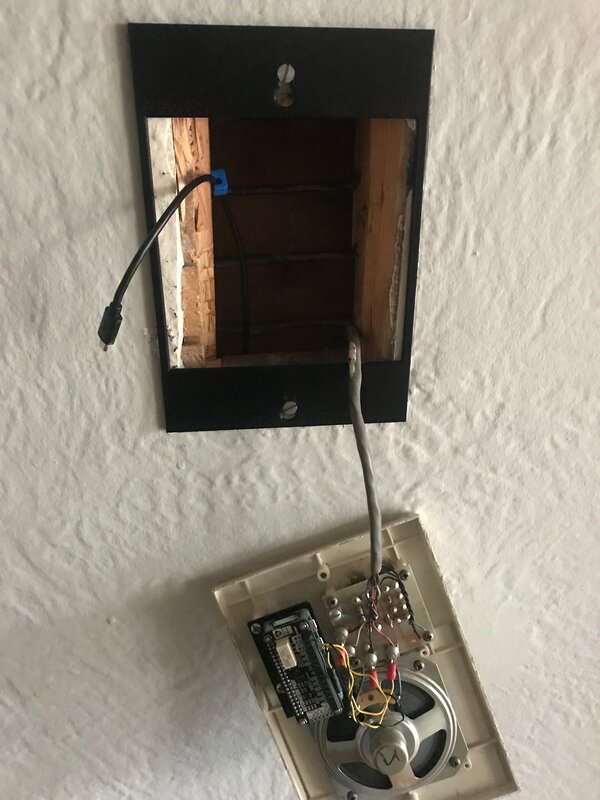
After wiring a Raspberry Pi Zero W into my 1970s apartment intercom to make it Siri-controllable, I needed a way to mount the Pi inside the panel. My first solution was a small piece of wood screwed into some unused screw terminals. It was nonconductive, quick, and easy enough to start with. But cutting a precise piece to fit in a few millimeters of clearance, inside an apartment with no workshop, was difficult. The wood grain made clean cuts even harder. It worked, but it always felt like a prototype. That got me thinking about 3D printing, a process I had zero experience with.
Getting Started with 3D Printing
I bought the cheapest and smallest printer I could find, a Monoprice, specifically to remake that wood mount in plastic. I was never able to get it working properly and eventually upgraded to a Prusa i3 MK3 kit. My first task was learning to model. Blender was too freeform for precise measurements. Fusion 360 turned out to be the right tool: parametric, measurement-driven, and well-covered on YouTube.
The mount itself was a good first project. A 3D printer making its own replacement parts sounds janky, but it's actually one of its best features: you can iterate and improve your own setup as you go. The opposite of planned obsolescence.
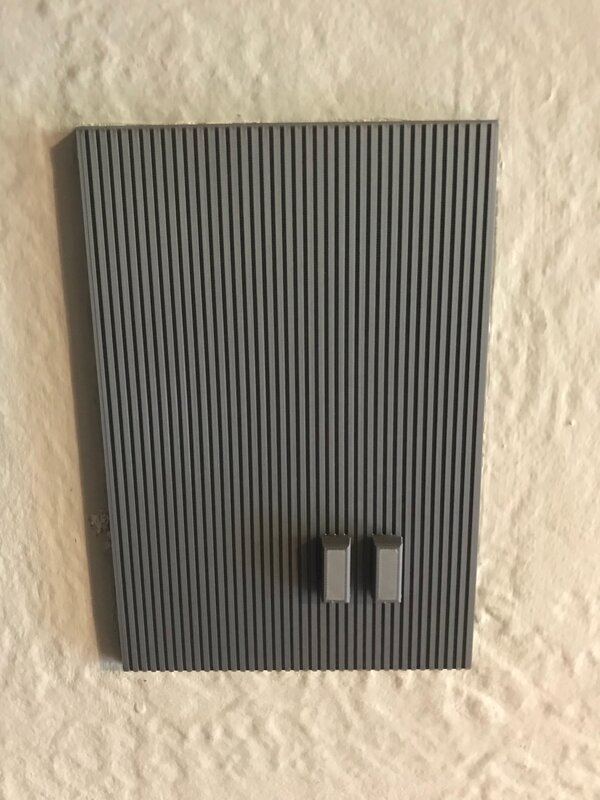
With that success I started thinking: why not remake the whole nasty-looking injection-molded panel? I started by printing and modeling other simpler things around the house. The full panel became my most challenging 3D model yet.
Remaking the Panel
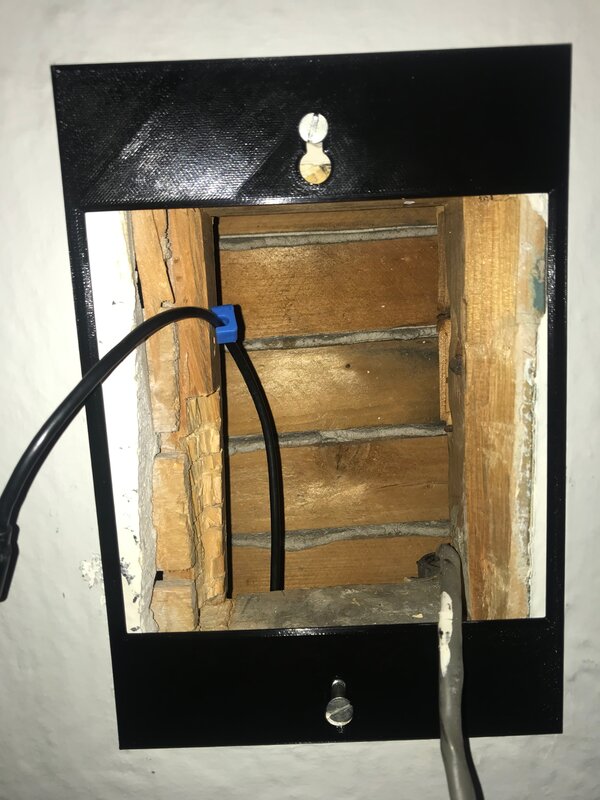
The hardest part was the inner wall cutout. The original panel was mortised into the wall, and the recess dimensions were practically impossible to measure accurately. Calipers couldn't fit into the corners. I made many prototypes until I found the right shape. 3D printing's fast iteration cycle was exactly what this required.
Installation
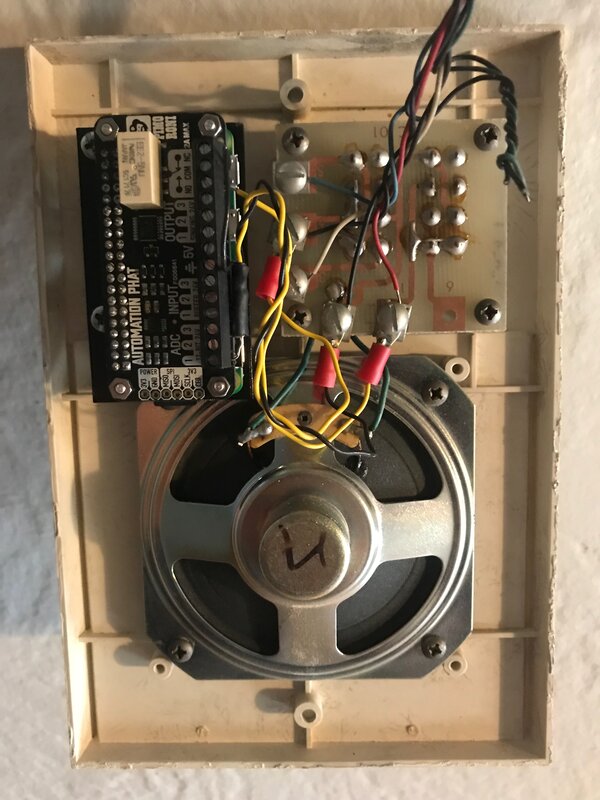
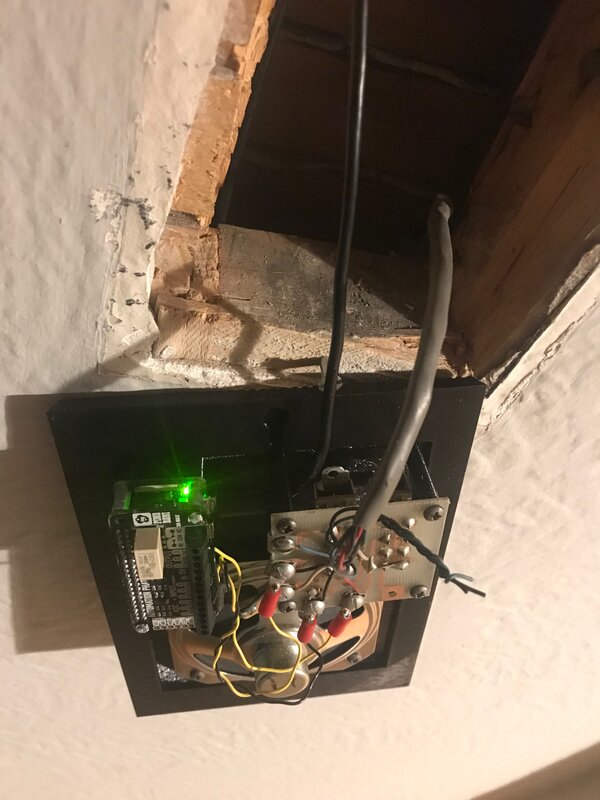
With a solid prototype shape, I mounted the Raspberry Pi and all the hardware into the panel and started the install.
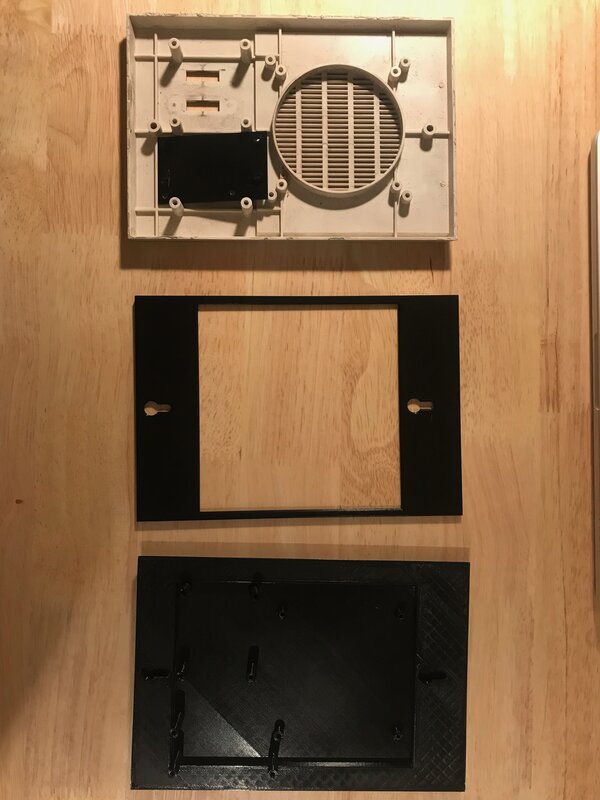
The three stages of the design, from rough mount to panel prototype to final panel, made the progression clear.
One problem I hadn't anticipated: whoever originally installed the panel had crudely chiseled the wall recess by hand and it wasn't remotely square. Getting the fully assembled Pi to fit required chiseling out even more material to make room.
Final Design
The final panel hides the front screw holes (my wife's idea) and echoes the original vertical slat pattern so it doesn't look out of place on the wall. I reprinted it in grey and added switch caps for a cleaner finish.
The print files are available on Printables.