From Raspberry Pi to ESP32
In 2018 I wired a Raspberry Pi Zero W into my 1970s apartment intercom to make it Siri-controllable. The Pi ran HAP-NodeJS, which worked, but always felt like overkill: a full Linux computer, an npm dependency tree, and Node.js runtime just to toggle a relay and sample an ADC pin. When Espressif released their ESP32 HAP SDK — a native C implementation of the HomeKit Accessory Protocol running on FreeRTOS — it was an obvious upgrade path. The full project source is available on src.nth.io.
Why ESP32
The original Pi-based implementation had a few pain points:
- Boot time. Linux takes 30+ seconds to come up. A doorbell event during that window is silently dropped.
- Fragility. HAP-NodeJS was difficult to install correctly and the Node/npm stack introduced a lot of surface area for things to break after an
apt upgrade. - Power. A Pi Zero W consumes around 400mA at 5V. An ESP32 at idle is under 10mA.
The ESP32 runs FreeRTOS, boots in under a second, and the entire firmware is a single compiled binary. No package manager, no interpreter, no OS updates.
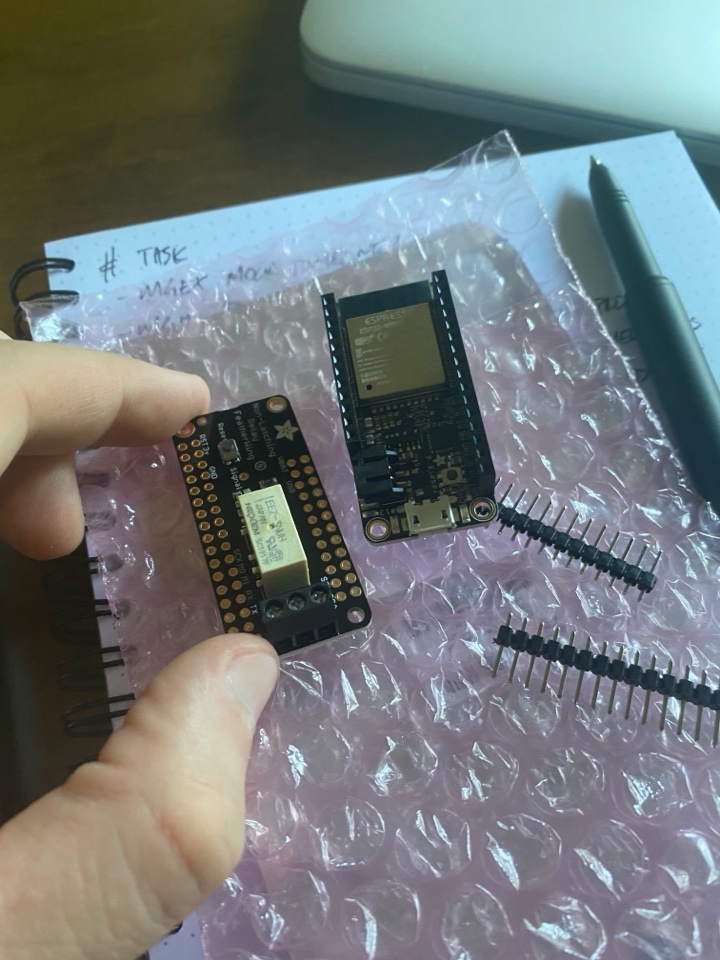
Components
Both boards use Adafruit's Feather form factor, so the Relay FeatherWing stacks directly on top of the HUZZAH32 with no additional wiring between them.
| Component | Price |
|---|---|
| Adafruit HUZZAH32 – ESP32 Feather Board w/ Stacking Headers | $21.95 |
| Adafruit Non-Latching Mini Relay FeatherWing | $7.95 |
| Total | $29.90 |
The Intercom Circuit
The building intercom runs at 52V AC (60Hz) with a 23V DC bias component shared across all units on a tier. The same two wires carry both signals simultaneously. This makes voltage sensing non-trivial.
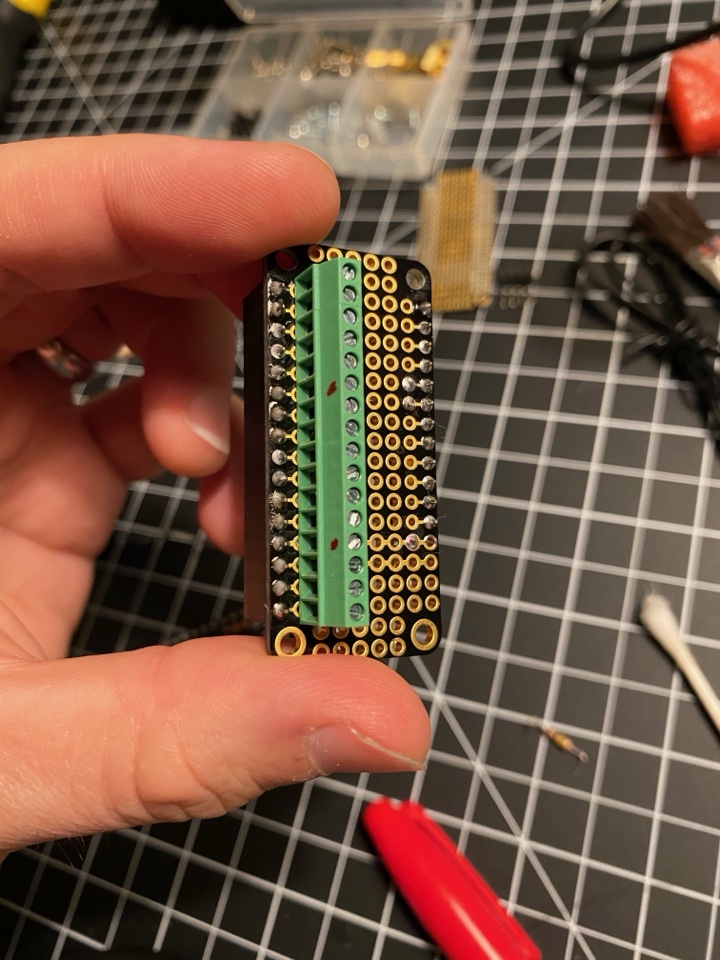
For the doorbell detection circuit, I built a resistive voltage divider to bring the signal into the ESP32's ADC range:
- R1: 100kΩ
- R2: 10kΩ + 2.2kΩ
The AC component is filtered with a 4.7µF capacitor, leaving only the DC component for the ADC to sample. When the lobby buzzer is triggered, the DC voltage drops approximately 20% — from a nominal ~23V down to roughly 18V, which maps to a 12-bit ADC reading shifting from ~3000 down into the 2300–2400 range.
For the door lock, a relay on GPIO 21 controls the existing solenoid circuit. The intercom panel's lock switch still works in parallel.
GPIO Architecture
GPIO pin cannot simultaneously be used for hardware interrupts and ADC sampling. I solved this by bridging two GPIO pins to the same voltage node:
- GPIO 27 — interrupt input (
GPIO_INTR_NEGEDGE), used for fast doorbell detection - GPIO 33 — ADC1 channel 5, used for voltage verification sampling
When the interrupt fires on GPIO 27, a FreeRTOS task wakes up and samples GPIO 33 fifteen times at 20-tick intervals to confirm the doorbell voltage is in range before triggering the HAP event. This eliminates false positives from noise spikes on the intercom line.
void bell_read_task(void *p)
{
    for (;;)
    {
        ulTaskNotifyTake(pdTRUE, portMAX_DELAY); // block until ISR
        sample_bell_adc();                       // confirm with ADC
    }
}
HomeKit Services
The firmware exposes two HomeKit services on a single accessory:
- Doorbell service — uses
hap_serv_doorbell_create()withHAP_CHAR_UUID_PROGRAMMABLE_SWITCH_EVENT. When the bell rings, it fires a single-press event to iOS, which generates a notification. - Lock mechanism service — uses
hap_serv_lock_mechanism_create(). A write callback handles lock/unlock commands and triggers an auto-relock timer matching the physical spring-back behavior of the original switch.
hap_acc_add_serv(intercom_accessory, bell_service_init());
hap_acc_add_serv(intercom_accessory, lock_service_init());
The accessory presents itself with HAP_CID_DOOR so iOS correctly categorizes it in the Home app.
Debouncing
The building intercom generates a messy signal — adjacent units ring simultaneously and the AC component causes voltage flutter. After the bell fires a HAP event, a FreeRTOS timer blocks further bell events for a configurable timeout period. This prevents a single lobby press from generating a burst of notifications.
void bell_rang()
{
    hap_char_update_val(bell_current_state, &HAP_PROGRAMMABLE_SWITCH_EVENT_SINGLE_PRESS);
    is_bell_blocked = true;
    xTimerReset(bell_block_timer_handle, pdFALSE);
}

void bell_block_timer_cb(TimerHandle_t timer)
{
    is_bell_blocked = false;
}
Partition Sizing
The HAP SDK binary is large enough that the default ESP-IDF single-app partition table doesn't fit it. The factory partition needs to be bumped from 1MB to 1.5MB in partitions_hap.csv:
nvs,      data, nvs,     , 0x6000,
phy_init, data, phy,     , 0x1000,
factory,  app,  factory, , 0x180000,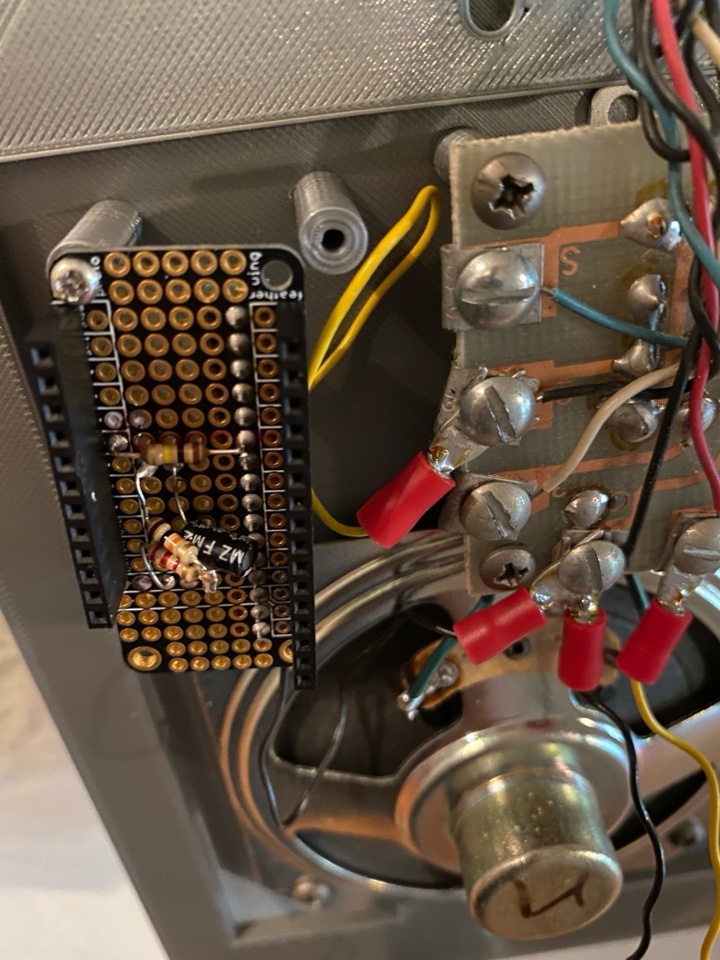
Result
The ESP32 intercom boots in under a second, uses a fraction of the power of the Pi, and has been running without intervention since installation. iOS doorbell notifications arrive within a second of the lobby button being pressed. The lock control works reliably via Siri, the Home app, and automations.
The main trade-off versus the Pi version is the development workflow — cross-compiling C with the ESP-IDF toolchain is more involved than editing a Python file and restarting a systemd service. But for a device that runs 24/7 and should never need touching, the embedded approach is clearly the right one.
Future Work
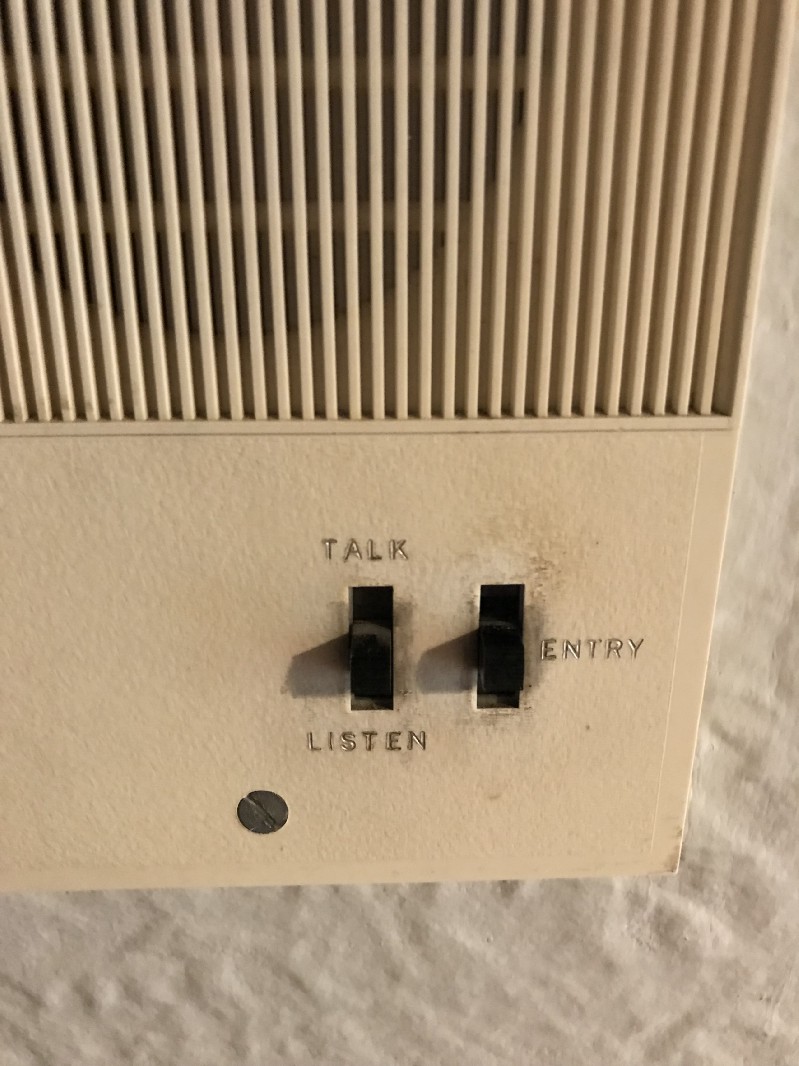
The "talk" and "listen" functions of the intercom panel remain unwired. Two-way audio over HomeKit is a possible next step, though the HAP audio spec is considerably more complex than doorbell events.